
How To Create A Newsletter Sign-up Page on Your WordPress Website
The number of newsletters is growing, and with it the number of newsletter tools. But what if I say you can have a branded landing page for newsletter on your website itself?
You, of course, will need a separate service to send the newsletters. But you no longer will need to try a tool to create new landing pages every time. You can have a single form which fits on every page of your website to capture emails.
You can use one simple form for each new squeeze page for a giveaway offer. The newsletter service provider will manage your subscribers, but you can create and host multiple email capture page on your website for free as and when needed
This article will show you how.
The difficulty level of the process is moderate. But you can set up an email newsletter landing page within 10 minutes. You just need to know your way around WordPress plugins.
Let’s continue.
Things you need for a custom landing page on WordPress
1. A self-hosted WordPress website: to get full control over the plugins and themes
2. An email marketing platform: to manage email IDs and send newsletters easily
3. Contact Form 7 plugin: to add a form to your email subscription landing page
4. Advanced Form Integration plugin: to connect the form to your newsletter platform
The steps to build the WordPress landing page
Step 1: Set up EmailOctopus account
EmailOctopus is an email newsletter service. It’s free to use (up to 2500 subscribers) and easy to set up. You can create multiple lists, build automated campaigns, and track newsletter analytics, all for free.
So, sign into your EmailOctopus account and fill in your details.
Now, you’ll have to wait for EmailOctopus to review your account before you can send your first email. The review is usually completed in 24-48 hours. And once it’s done, you're ready to move forward.
If you wish to sign up for the Pro version, use my referral link to get $15 off your first payment. EmailOctopus Pro has additional features like an increased subscriber limit, more emails and better analytics.
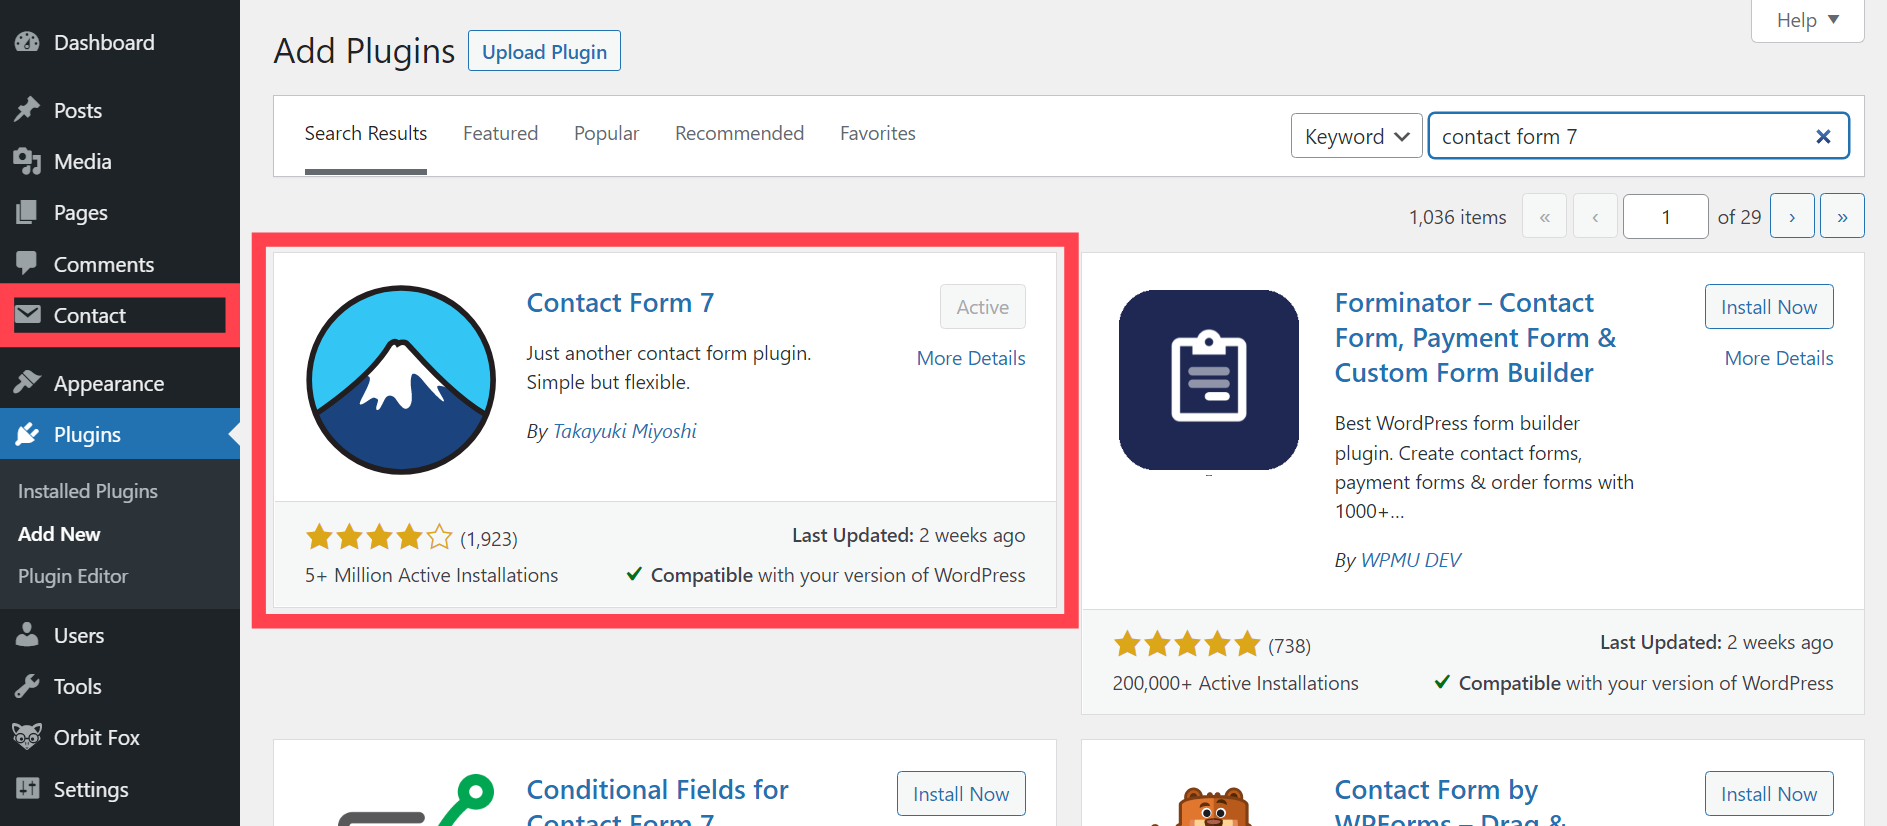
Step 2: Install Contact Form 7 plugin
Next, log into your WordPress Admin Dashboard and install Contact Form 7 plugin. Activate it and you’ll see a “Contact” option in the left side panel.
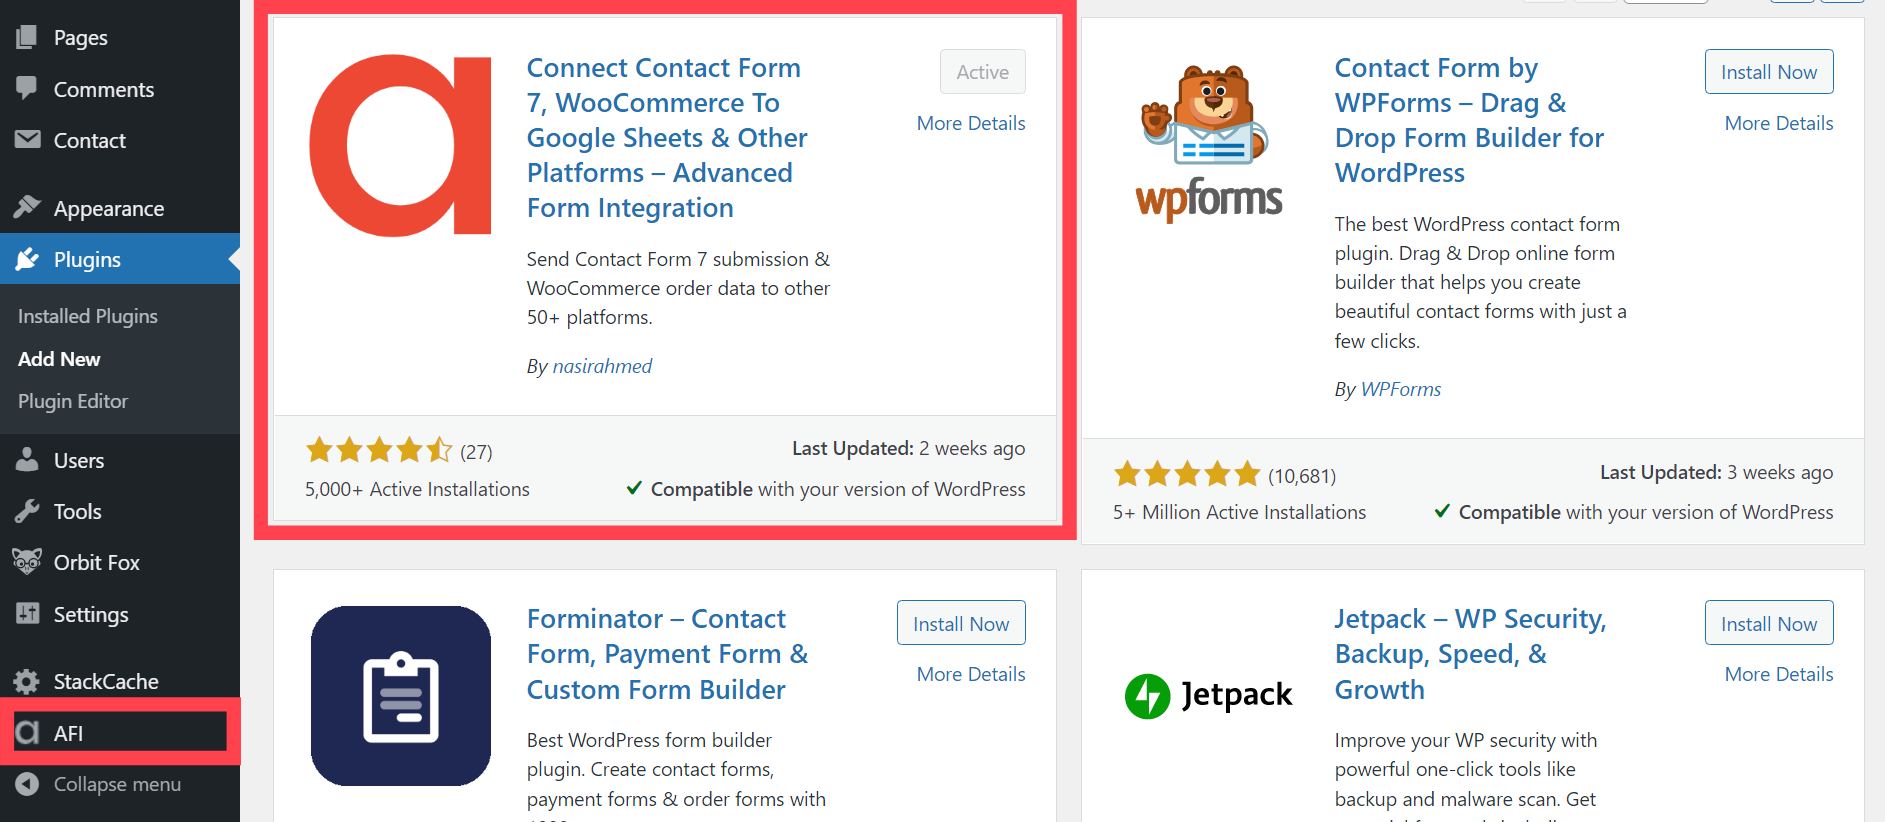
Step 3: Install Advanced Form Integration plugin
After installing Contact Form 7, look for Advanced Form Integration plugin. Install and activate it. You’ll get a pop-up asking you to opt in to receive notifications, which you can safely Skip. The “AFI” option will appear in the left side panel.
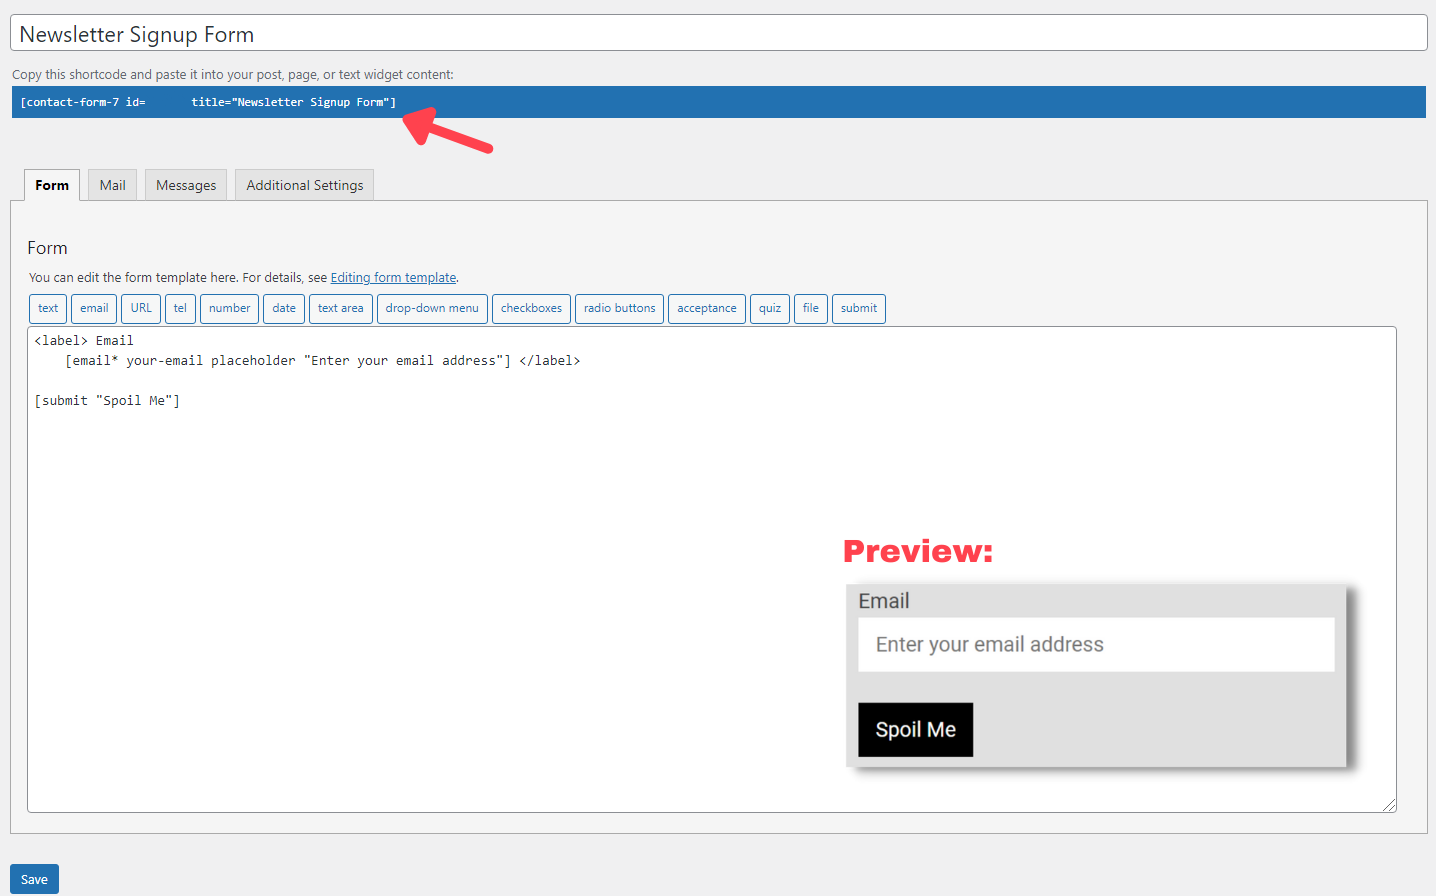
Step 4: Create newsletter sign up form
Now click on Contact >> Add New, to create the form for your newsletter landing page.
Add form fields and labels as you need and save the form. You’ll get a short code, which you need to insert in your newsletter sign up landing page.
Now, Contact Form 7 is basically a plugin to set up contact forms.
So, you’ll also need to set up an email to receive an email whenever anyone tries to “contact” you. Additionally, you can tweak the error messages your form can show.
But you can make those changes later. Let’s move on to the next step and link the form to your EmailOctopus account.
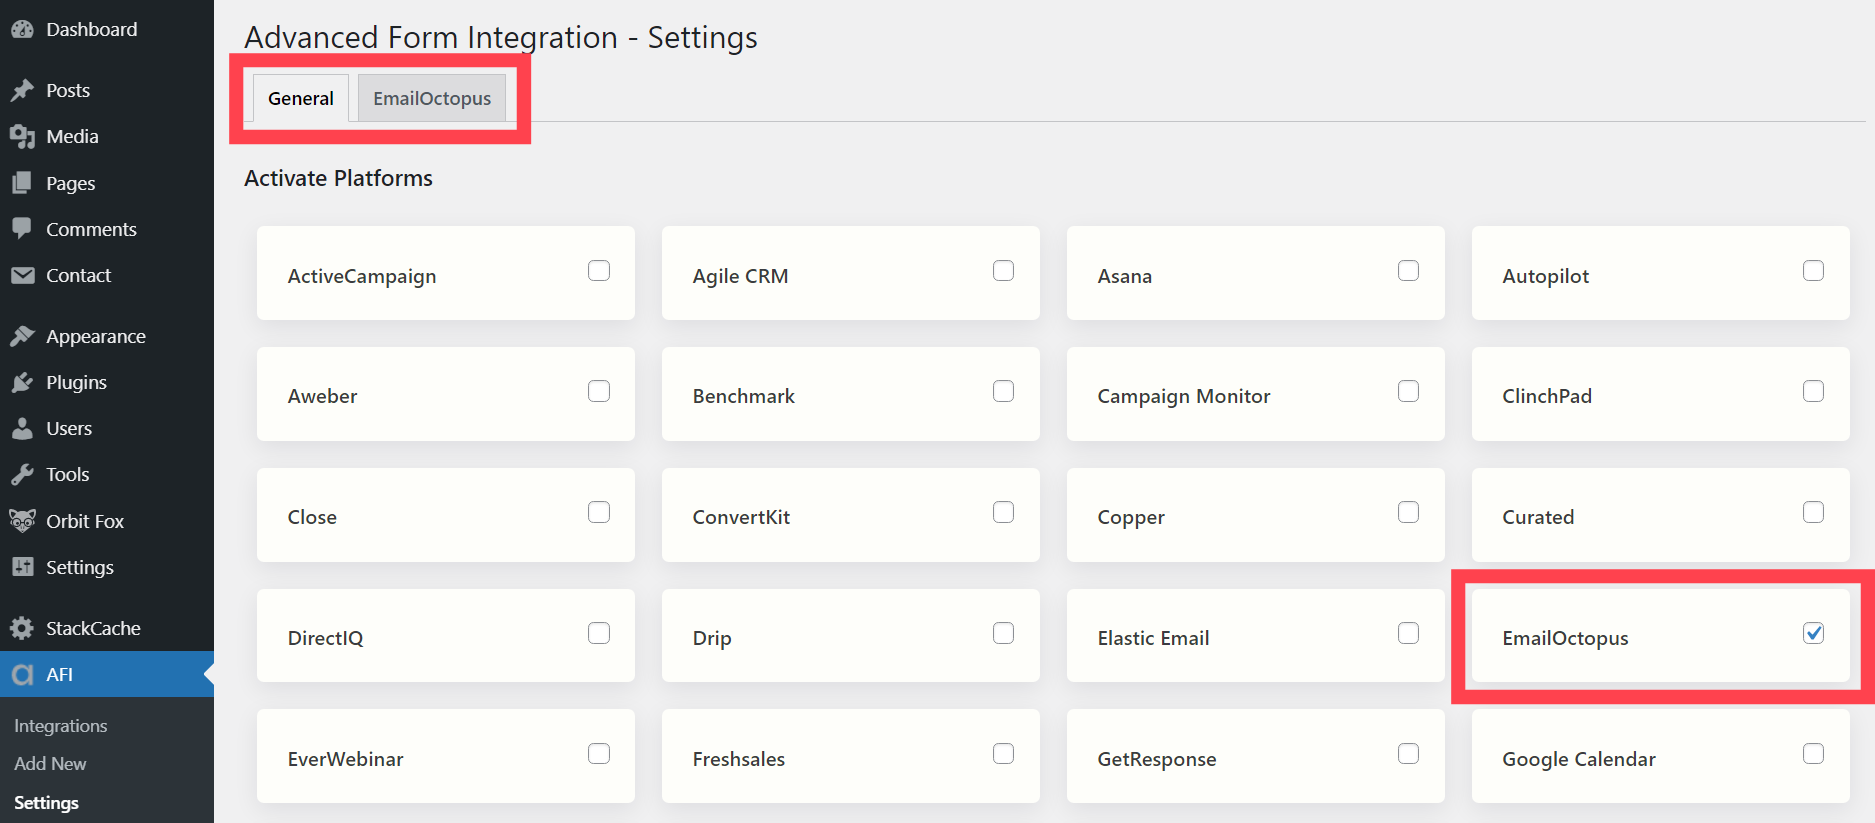
Step 5: Link form with EmailOctopus
Go to AFI >> Settings. Select EmailOctopus from the different email marketing solutions and automations you see on the screen. Save it, and you'll see a new “EmailOctopus” tab.
Click on that “EmailOctopus” tab. You see a link there? Click on it to go to the API key screen of EmailOctopus. Now, copy the API key phrase and paste it in the EmailOctopus API key box in the AFI Settings page.

And it’s almost done.
Go to AFI >> Add New, to create a new integration. Choose Contact Form 7 as form provider and EmailOctopus as your platform. Now, map the Contact Form 7 fields to the corresponding fields in EmailOctopus, and save the changes.
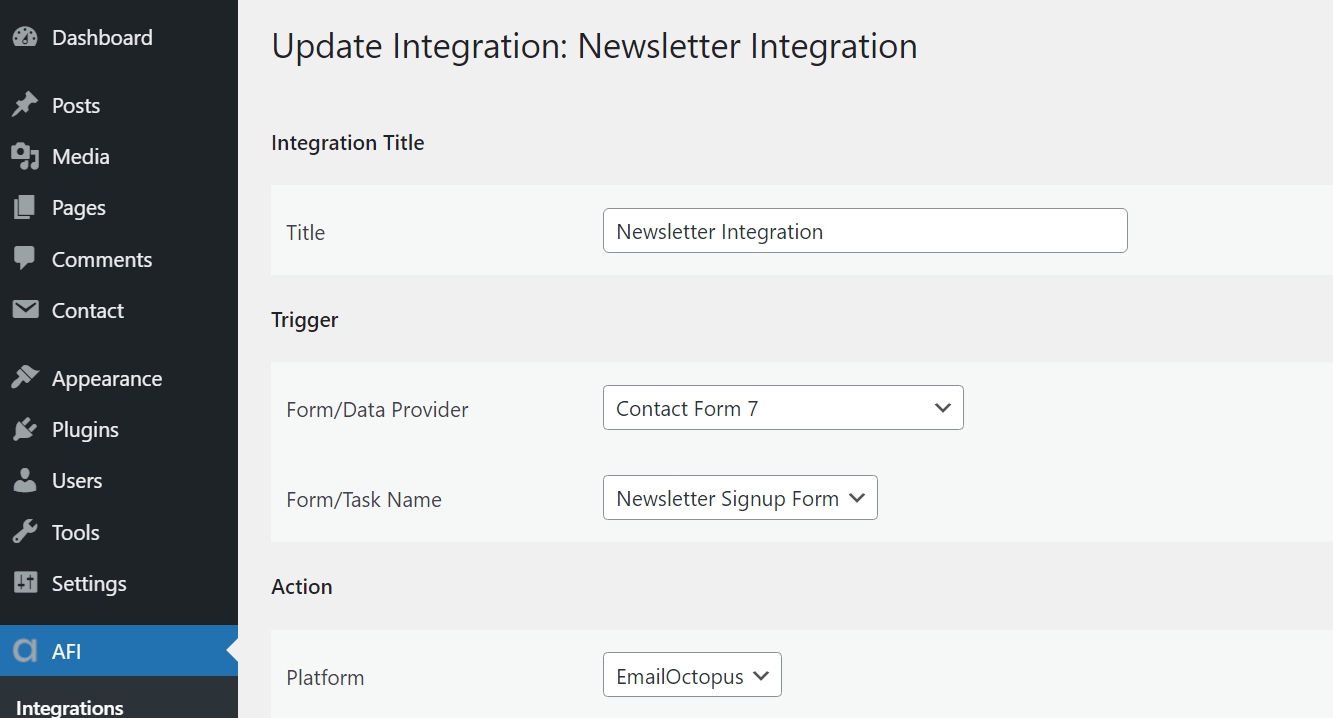
Upon saving, you'll see the new integration in the list of AFI integrations. And if everything went well, your newsletter form can accept new emails and add them to your EmailOctopus email marketing list.
Step 6: Design email capture landing page
Now, get your landing page for newsletter sign up ready.
Just write the landing page copy and insert the short code of the form you created earlier in Step 4. And there you have your free landing page to collect emails.
Test it, test it again, and test it the third time. Check it four more times just to be sure it’s working fine
Step 7: Make it live
Once you're convinced your freshly created email landing page is adding subscriber details to EmailOctopus, publish the page.
And it’s done.
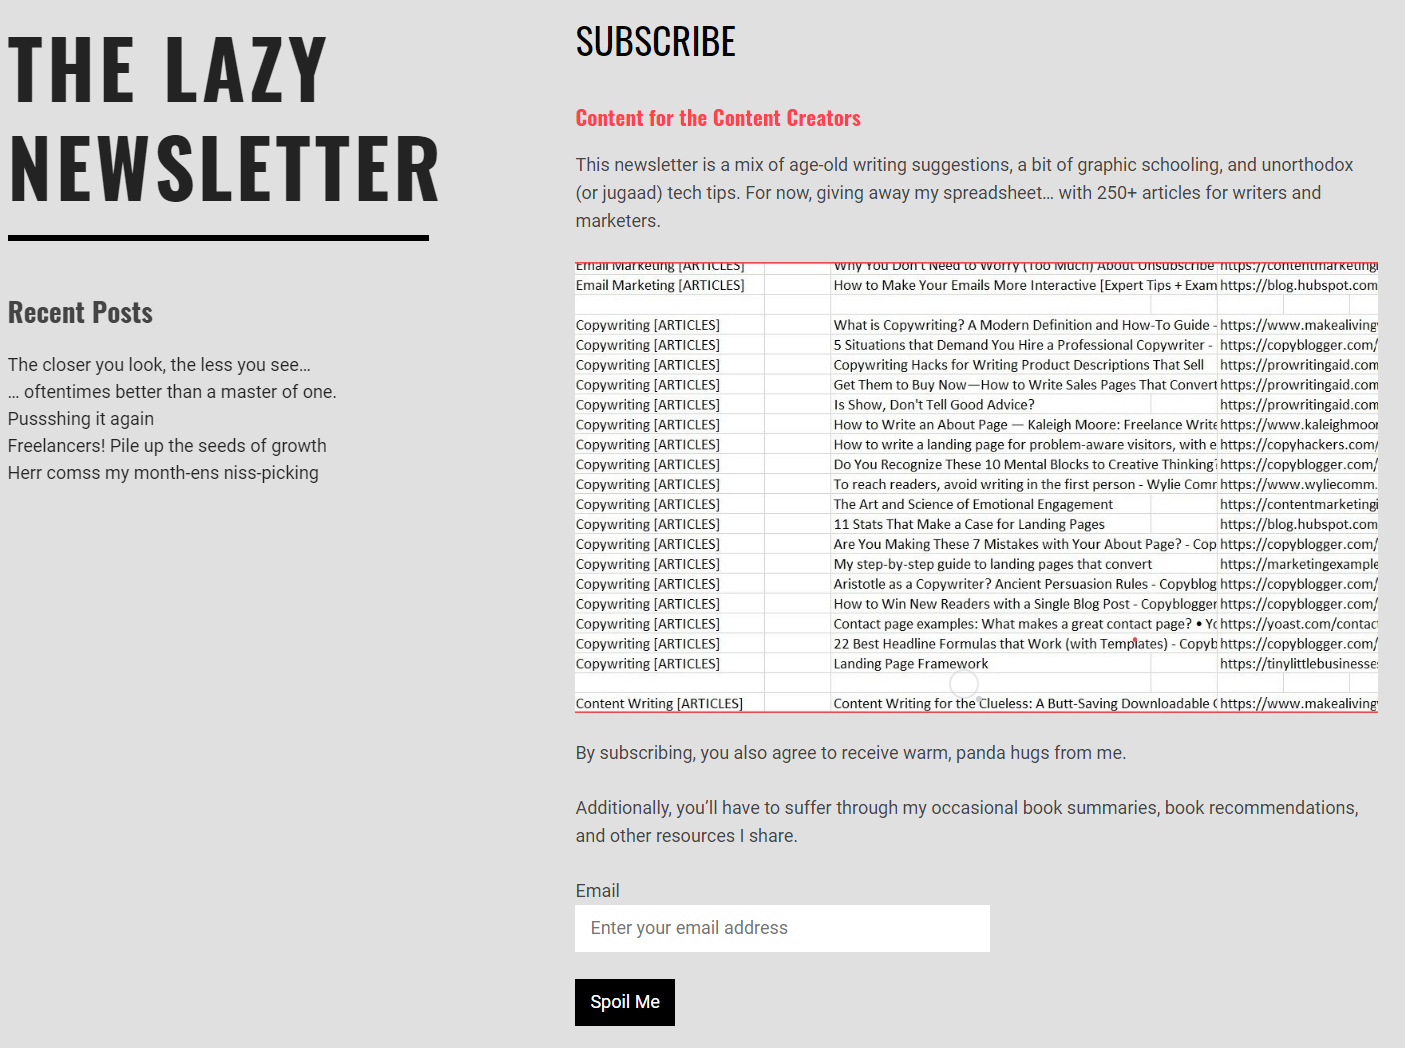
Here’s my free newsletter landing page for example, built and hosted on WordPress.
Now, promote…
Building a lead capture (or subscriber) form is only the first step to successful email marketing campaigns. An effective newsletter email marketing strategy needs you to get out among your target audience and promote your offer.
But now that you have your page ready, you can grab emails and send email newsletters or run personalized email campaigns.
Subscribe to the Lazy Newsletter to get book summaries, content tips and occasional hugs in your inbox.
And if you feel this post helped you today, you can send me a coffee… It’s up to you; you can choose not to.